Showing posts with label crafts. Show all posts

Thursday, June 20, 2013

A Belated Birthday Post - Cora's Rainbow and Musical Birthday


When Cora turned one, we started taking her to music class.  Even though she could barely talk when we started, she seemed to enjoyed the class and I was pleasantly surprised when she started reciting rhythm patterns on her own.  So when it came time to decide on what to do for her 2nd birthday, I knew it was a no brainer to have her party there. The facility has a party room decorated in bright colors behind the classroom. I decided to embrace the colors of the classroom and that's how I came up my theme. For three months, my life revolved around rainbows and music notes. Here are the details and decorations for the party...

Invitations:
I found a ton of rainbow invitations and a ton of music themed invitations, but not one single rainbow and music invitation.  So I semi-created my own. I found this cute rainbow invitation, added the music notes, and viola! It turned out super cute!

Name banner:
I made this cute name banner using my Cricut cutter for the letters and white circles.  For the rainbow pinwheels, I used my Martha Stewart paper ornament template.
Surprisingly, it only took a couple of hours to put together. I finished it off by stringing it together with rainbow colored yarn.

Water bottle labels:
Cora's invitation had the chevron rainbows on them, so I thought I'd incorporate that into my water bottles. I created these adorable labels and just slapped them on water bottles.
If you like these labels and want to use them for a rainbow birthday party, I created a free template for you to use.  Just click here.  

PB & Jammin' Sandwiches:
Since I was 7 months pregnant at the time of this party, I knew I had to keep my party food simple and easy to assemble. I decided to use Uncrustable PB&J Sandwiches from Smuckers. To keep in theme with my party, I used a music note cookie cutter on tie-dye fruit roll-up to cut out these adorable notes. I cut these out a few days before my party.
A couple of hours before the party, I took the sandwiches out of the freezer and placed them on my serving tray. Since the sandwiches are frozen and the fruit roll-ups are sticky, the music notes easily adhere to the sandwiches on their own.

Pepperoni Prelude Pizza:
Trader Joe's have these wonderful bite sized cheese pizzas. I bought pepperoni slices and used my same cookie cutter to make music note shaped pepperoni.

Music School of Fish:
I used a large music note cookie cutter to   seperate the rainbow colors from the regular cheese color.

A Fruit Melody:
I used strawberries, oranges, pineapple, kiwi, blueberries, and red grapes to make this fruit tray.  The music note is made from black colored candy melts.

Rainbow cupcakes with candy music toppers.
With 18 toddlers coming to the party. I figured cupcakes were the way to go. I made a basic white cake batter, divided it  by four, and colored each small batch.
Each cupcake was topped with cream cheese icing and a music note topper.  I made the music note toppers out of different colors of candy melt. 

Rockin' Party Favor Bags:
For the party favor bags, I used simple white lunch bags. I used my Cricut to cut out the guitars and the rainbow yarn to tie the bags with.  The bags were filled with rainbow music note stickers, colorful birdie whistles, sparkly maracas, and colorful goldfish.

Photography:

Throwing a party can be hectic. You're running around trying to make sure everything is in place, talking to your guest, and sometimes you just want to enjoy the party. All of this makes picture taking impossible. I love having a photographer on hand to capture all of the details and wonderful moments of the party. It's usually my biggest splurge, but its been worth it. Thank you Jamie LeBlanc for taking great pictures for us!


I hope you enjoyed our rainbow and music party.  We had a musically good time! 

Tuesday, June 4, 2013

Surprise!


What I thought was going to be another run-of-the-mill office meeting, turned out to be a surprise belated baby shower/ welcome back party for me. 


Look at these amazing diaper/baby blanket creations my co-worker did for me.


It was such a sweet gesture.  I am lucky to be working with such a great group of people!

Sunday, June 3, 2012

DIY: Making Felt Cupcakes (Free Pattern & Tutorial)


Aren't these just adorable?  One of the things I love about making felt food is that it's easy, inexpensive, and so cute once they're done.  I made these as my daughter napped today. I also took lots of pictures and created a pattern so you can make some too.

Here is the pattern.  Cut the pattern out and trace it on to your felt. Then cut your felt pieces.  Your cupcake pieces look something like this...

Okay I know it looks like a happy face.  I placed it that way because it made me giggle :-)  As you can see, we are making a chocolate cupcake.  So you should have:
  • cupcake bottom
  • cardboard bottom
  • cupcake top
  • cupcake side


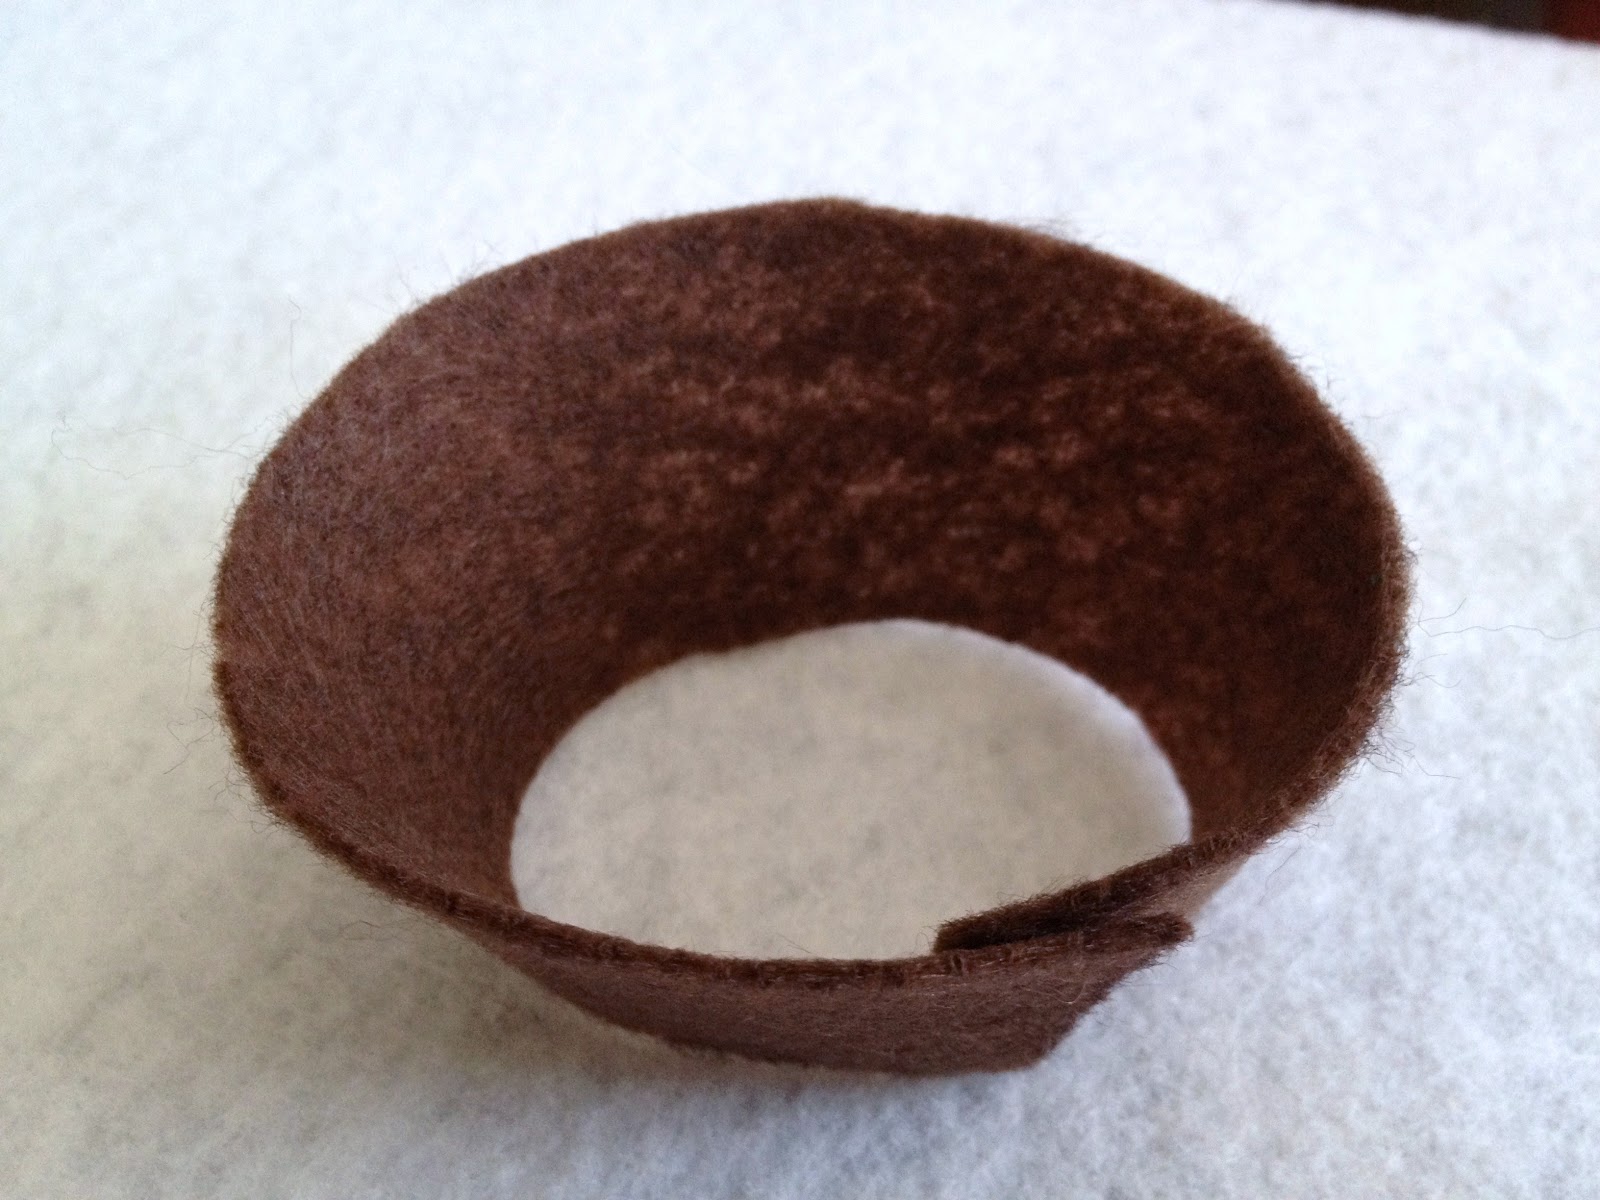
Take your cupcake side and overlap the two ends slightly.  It should look like this.. 


Sew the piece together using a whip stitch.  In case you don't know how to whip stitch by hand, here is a good video.  It's really easy and you can do this while watching t.v.  


Once that's done, you can sew the cupcake bottom to the cupcake side using the same stitch.  When you are done, it should look like this....


Next, sew the cupcake top on. About half way through, place your cardboard bottom on the inside of your cupcake.  This will help your cupcake stand.  No need to glue it on.  You will add the stuffing next and that will keep the cardboard in place.  Once you stuffed your cupcake, sew it shut.


Ice, Ice Baby!  Time to cut out some icing.


Once my icing pieces were cut, I went ahead and used fabric glue to place the icing.  You can sew this if you prefer. First glue Icing A, B, C, D, and the topping of choice all together.


Once the icing has been assembled, glue the entire top to the cupcake.  Allow to dry according to your fabric glue instructions (mine says 24 hours).

Viola!  Your cupcake is ready to be served at your child's next tea party.


I designed these cupcakes to be the same size as actual cupcakes, so you can put them in muffin tins or in cupcake liners.


Enjoy!


Sunday, May 20, 2012

Organizing A Hairy Situation


Cora's hair accessories were out of control. When she first started getting hair clips and barretts I'd put them in a little bowl on her dresser and it was fine. A year later, there were just too many for the little bowl, so I decided to organize it.


For my supplies, I used a plain 16 x 20 artist canvas, ribbon, and staples. I chose brown and golden yellow to coordinate with Cora's room.


I cut 6 stands of ribbon, each at 25 inches long. I then measured and stapled the ribbons 2 inches apart to the back of the canvas.


Staple the top and bottom and cut off any excess ribbon (if any) and the back should look like this...


Flip over and you're ready to add your hair accessories.


Have a great day!


- Posted using BlogPress from my iPhone

Saturday, May 19, 2012

Yum Yum Dim Sum!

Back in December, we took Cora to The Children's Museum and stumbled across this little Asian play area.


It was the first time I had seen Chinese play food. I really wanted to buy a set for Cora, but they didn't sell it in the gift shop and I couldn't find a dim sum set online. I guess if I wanted her to have one, I'm going to have to make it. Here's how it turned out...

Siu Mai


Dumplings, Mini Egg Rolls, and Bao


Banana Leaf Sticky Rice


I really love how these turned out. I may have to make sets for my nieces and nephews.

- Posted using BlogPress from my iPhone

Monday, May 14, 2012

Happy Mother's Day


This was my 2nd Mother's Day and my husband did a wonderful job of making it a special day. He had a delicious breakfast waiting for me and he planned a surprise lunch with my best mommy friends.

Wishing all the mothers out there a very Happy Mother's Day!

- Posted using BlogPress from my iPhone

Wednesday, May 9, 2012

Playing With Food

Since we built Cora a new kitchen, it was only right that she had some food to make and serve. I did a little research and found a great tutorial on making easy foods out of felt.

Here's how mine turned out...


For my egg, I sewed a topstitch around the yellow, but left a small opening so I could stuff it with batting. Then I sewed it closed.


For the pancakes. I sewed the butter to the syrup, then the syrup to just the top layer of the pancake. Then I top stitched the pancake to a plain pancake. I like having 2 layers because it makes it more durable.

Making the pasta.... I didn't have the fancy scissors like in the tutorial, so I just cut my jagged edges with my regular scissors. It made a mess, but gosh these turned out cute.


Doesn't it look like we're really cooking pasta?


Breakfast is served!


Mangia!


- Posted using BlogPress from my iPhone