Showing posts with label Cora. Show all posts

Thursday, June 20, 2013

A Belated Birthday Post - Cora's Rainbow and Musical Birthday


When Cora turned one, we started taking her to music class.  Even though she could barely talk when we started, she seemed to enjoyed the class and I was pleasantly surprised when she started reciting rhythm patterns on her own.  So when it came time to decide on what to do for her 2nd birthday, I knew it was a no brainer to have her party there. The facility has a party room decorated in bright colors behind the classroom. I decided to embrace the colors of the classroom and that's how I came up my theme. For three months, my life revolved around rainbows and music notes. Here are the details and decorations for the party...

Invitations:
I found a ton of rainbow invitations and a ton of music themed invitations, but not one single rainbow and music invitation.  So I semi-created my own. I found this cute rainbow invitation, added the music notes, and viola! It turned out super cute!

Name banner:
I made this cute name banner using my Cricut cutter for the letters and white circles.  For the rainbow pinwheels, I used my Martha Stewart paper ornament template.
Surprisingly, it only took a couple of hours to put together. I finished it off by stringing it together with rainbow colored yarn.

Water bottle labels:
Cora's invitation had the chevron rainbows on them, so I thought I'd incorporate that into my water bottles. I created these adorable labels and just slapped them on water bottles.
If you like these labels and want to use them for a rainbow birthday party, I created a free template for you to use.  Just click here.  

PB & Jammin' Sandwiches:
Since I was 7 months pregnant at the time of this party, I knew I had to keep my party food simple and easy to assemble. I decided to use Uncrustable PB&J Sandwiches from Smuckers. To keep in theme with my party, I used a music note cookie cutter on tie-dye fruit roll-up to cut out these adorable notes. I cut these out a few days before my party.
A couple of hours before the party, I took the sandwiches out of the freezer and placed them on my serving tray. Since the sandwiches are frozen and the fruit roll-ups are sticky, the music notes easily adhere to the sandwiches on their own.

Pepperoni Prelude Pizza:
Trader Joe's have these wonderful bite sized cheese pizzas. I bought pepperoni slices and used my same cookie cutter to make music note shaped pepperoni.

Music School of Fish:
I used a large music note cookie cutter to   seperate the rainbow colors from the regular cheese color.

A Fruit Melody:
I used strawberries, oranges, pineapple, kiwi, blueberries, and red grapes to make this fruit tray.  The music note is made from black colored candy melts.

Rainbow cupcakes with candy music toppers.
With 18 toddlers coming to the party. I figured cupcakes were the way to go. I made a basic white cake batter, divided it  by four, and colored each small batch.
Each cupcake was topped with cream cheese icing and a music note topper.  I made the music note toppers out of different colors of candy melt. 

Rockin' Party Favor Bags:
For the party favor bags, I used simple white lunch bags. I used my Cricut to cut out the guitars and the rainbow yarn to tie the bags with.  The bags were filled with rainbow music note stickers, colorful birdie whistles, sparkly maracas, and colorful goldfish.

Photography:

Throwing a party can be hectic. You're running around trying to make sure everything is in place, talking to your guest, and sometimes you just want to enjoy the party. All of this makes picture taking impossible. I love having a photographer on hand to capture all of the details and wonderful moments of the party. It's usually my biggest splurge, but its been worth it. Thank you Jamie LeBlanc for taking great pictures for us!


I hope you enjoyed our rainbow and music party.  We had a musically good time! 

Tuesday, May 28, 2013

"Mommy, I Do It"

Lately my 2 year old daughter's favorite phrase is, "Mommy, I do it." And boy, does she want to do everything.  For Memorial  Day, I offered to bring dessert to a barbecue. So since I happened to have all of the ingredients for Dump Cake and the instructions are so easy, a two year old could do it, I decided to let Cora make her first dessert.  Here's how she made it...

You need:
  • 1 can (21 Oz.) Cherry Pie Filling
  • 1 can (15 Oz.) Crushed Pineapple
  • 1 box (about 18 Oz.) Yellow Cake Mix
  • 1/2 cup Chopped Pecans (optional)
  • 1 stick Margarine
  • 1/2 stick Butter

Preheat the oven at 350. 
While that's heating up, dump your can of cherries in a 9 x 13 pan.

Next, dump your can of crushed pineapple in the pan.  You don't need to drain it. Just dump the whole thing in.

Now mix until all of the fruit and juices are combined in fruit harmony.  

Now it's time for the cake mix. If you opted to add the pecans, dump the pecans in your cake mix.  Then dump the cake mix on top of the fruit. Spread it evenly throughout your pan. Do not mix it in with the fruit. You should have a layer of fruit and a layer of cake mix.

Cut up the margarine and butter into slices. Then distribute the pats of butter and margarine on top of the cake mix.

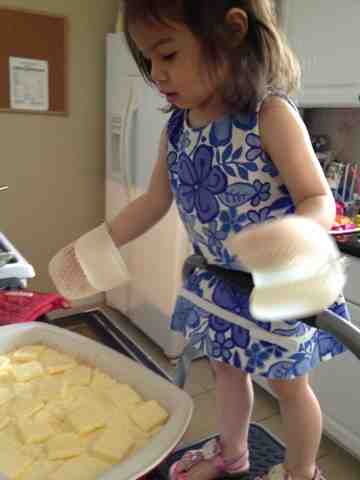
Of course, after Cora added the butter, I went in rearranged the butter, so it was more evenly distributed.  And of course every time I had to assist her, she said, "No mommy. I do it!" 

Now your Dump Cale is ready for the oven. Bake at 350 for 45 minutes to an hour.

Don't worry, I didn't really let her put the pan in the oven.  She was happy just to have oven mitts.

While ours baked, we cleaned up, had tummy time with Julia, checked in on our cake's progress, and sang songs.  

Once it was ready, I took it out of the oven and prepped it to take to the barbecue.  Unfortunately we were having a crisis at the time (I'll explain in a minute) and I forgot to take a picture of the fresh-out-of-the-oven cake.  Here it is after we got into it. Seriously delicious! It's kind of like a fruit crisp. My husband loves it with a scoop of Blue Bell Homemade Vanilla Ice Cream.  By the time we left, the entire cake was gone.

Okay back to my crisis.. Right as we were getting to leave, Cora decided to grab a smoky eyeshadow compact when I wasn't looking. She plopped herself right in the middle of my bed pillows (a favorite spot of hers), and decided to apply it herself.  I can just hear her saying, "Mommy, i do it!"  I have a white comforter and 2 white pillows. She and my bed were a mess when I found her!


We were so late, but at least her dessert was a hit!

Monday, May 27, 2013

Sunday Funday: Exploring Houston


From time to time, Will and I jump in the car and explore our large city. We try to find attractions that cost little to no money because... 1) It's a challenge. 2) It fits the budget.  3) You can really find strange and unusual places off the beaten path.  So after being cooped up for a few days, due to a cold, it was a good time to stretch our legs and explore. 

On this trip, we hit 3 spots.  Our first stop was The Beer Can House.  Admission is $2. $5 for a guided tour. Since we got there 10 minutes before closing, we just walked up and snapped a few pictures.

This house was 18 years in the making and is covered with approximately  50,000 beer cans and bottles.  The owner is a retired upholster from Southern Pacific Railroad and one day he just decided to cover his house with aluminum cans. 

Our second stop was The Art Car Museum.  Every year, Houston has an Art Car parade and since I miss it every year, I figured this was the next best thing. Admission is free.

Here are the cars we saw. We weren't able to stay long because Cora was a little scared of these strange and eclectic cars.


Our last (and my favorite) stop was at The Blue Trees.

Artist, Konstantin Dimopoulos, was commissioned to recreate his outdoor living project to generate awareness to the many trees Houston lost to the 2011 drought and the aftermath of Hurricane Ike.  The trees were painted with biologically-safe, water-based ultramarine mineral pigments. When I accidentally  brushed up against the trees, the blue paint came off very easily and the texture resembled chalk. There's no telling how long these trees will stay blue, but for now, they do make a very striking statement.


I hope everyone had a wonderful weekend!

Friday, June 22, 2012

Father's Day Daycation


I must admit, I am so lucky to have Will as my husband. Not only is a great husband, he is a wonderful daddy to our little girl. Since he made my Mother's Day so special, I wanted to make sure he had a memorable Father's Day.

We started the day with a little breakfast and a homemade card.
It's amazing what you can do with apps these days. I used Turbo Collage to piece the many pics I've taken of these two all snuggled up.


Then I printed it and created this card...


(Note to self...invest in washable markers and hide the colorful Sharpie pens from Cora).

After breakfast and a nap for Cora, we packed up for a Daycation in Galveston (which is about 45 miles outside of Houston).

We lunched at Gaido's. Apparently this restaurant has been here since 1911. I don't know how it's survived all of those hurricanes.


Cora looking out to sea.


We decided to take the ferry over to Boliver Island. My gosh the line to get on the ferry was soooooo long. When we finally got to the loading zone. We had a chance to get out and stretch our legs. Thank goodness it was a "controlled area".


Before we went to Galveston, I read online how the kids love feeding the birds from the back of the ferry. I brought some leftover bread from our lunch and we headed to the back of the boat. Cora loves watching the birds out the window at home and i just knew she was going to love this. I start to throw the bread and instantly a huge flock of seagulls were hovering right over us. My face went from excited to sheer panic. These birds were ready to take that bread right out of my hand and peck our eyes out! Okay, okay, a little exaggeration, but I swear they were all saying, "Mine! Mine! Mine! Mine!" I ended up chucking the whole bread so we could escape. It was definitely a Finding Nemo/ The Birds moment!


Once we got away. We enjoyed the rest of our ride and a quick drive around the island


After a lovely day (minus the bird attack), we headed back on the ferry just in time to catch this beautiful sunset.


- Posted using BlogPress from my iPhone

Sunday, June 3, 2012

DIY: Making Felt Cupcakes (Free Pattern & Tutorial)


Aren't these just adorable?  One of the things I love about making felt food is that it's easy, inexpensive, and so cute once they're done.  I made these as my daughter napped today. I also took lots of pictures and created a pattern so you can make some too.

Here is the pattern.  Cut the pattern out and trace it on to your felt. Then cut your felt pieces.  Your cupcake pieces look something like this...

Okay I know it looks like a happy face.  I placed it that way because it made me giggle :-)  As you can see, we are making a chocolate cupcake.  So you should have:
  • cupcake bottom
  • cardboard bottom
  • cupcake top
  • cupcake side


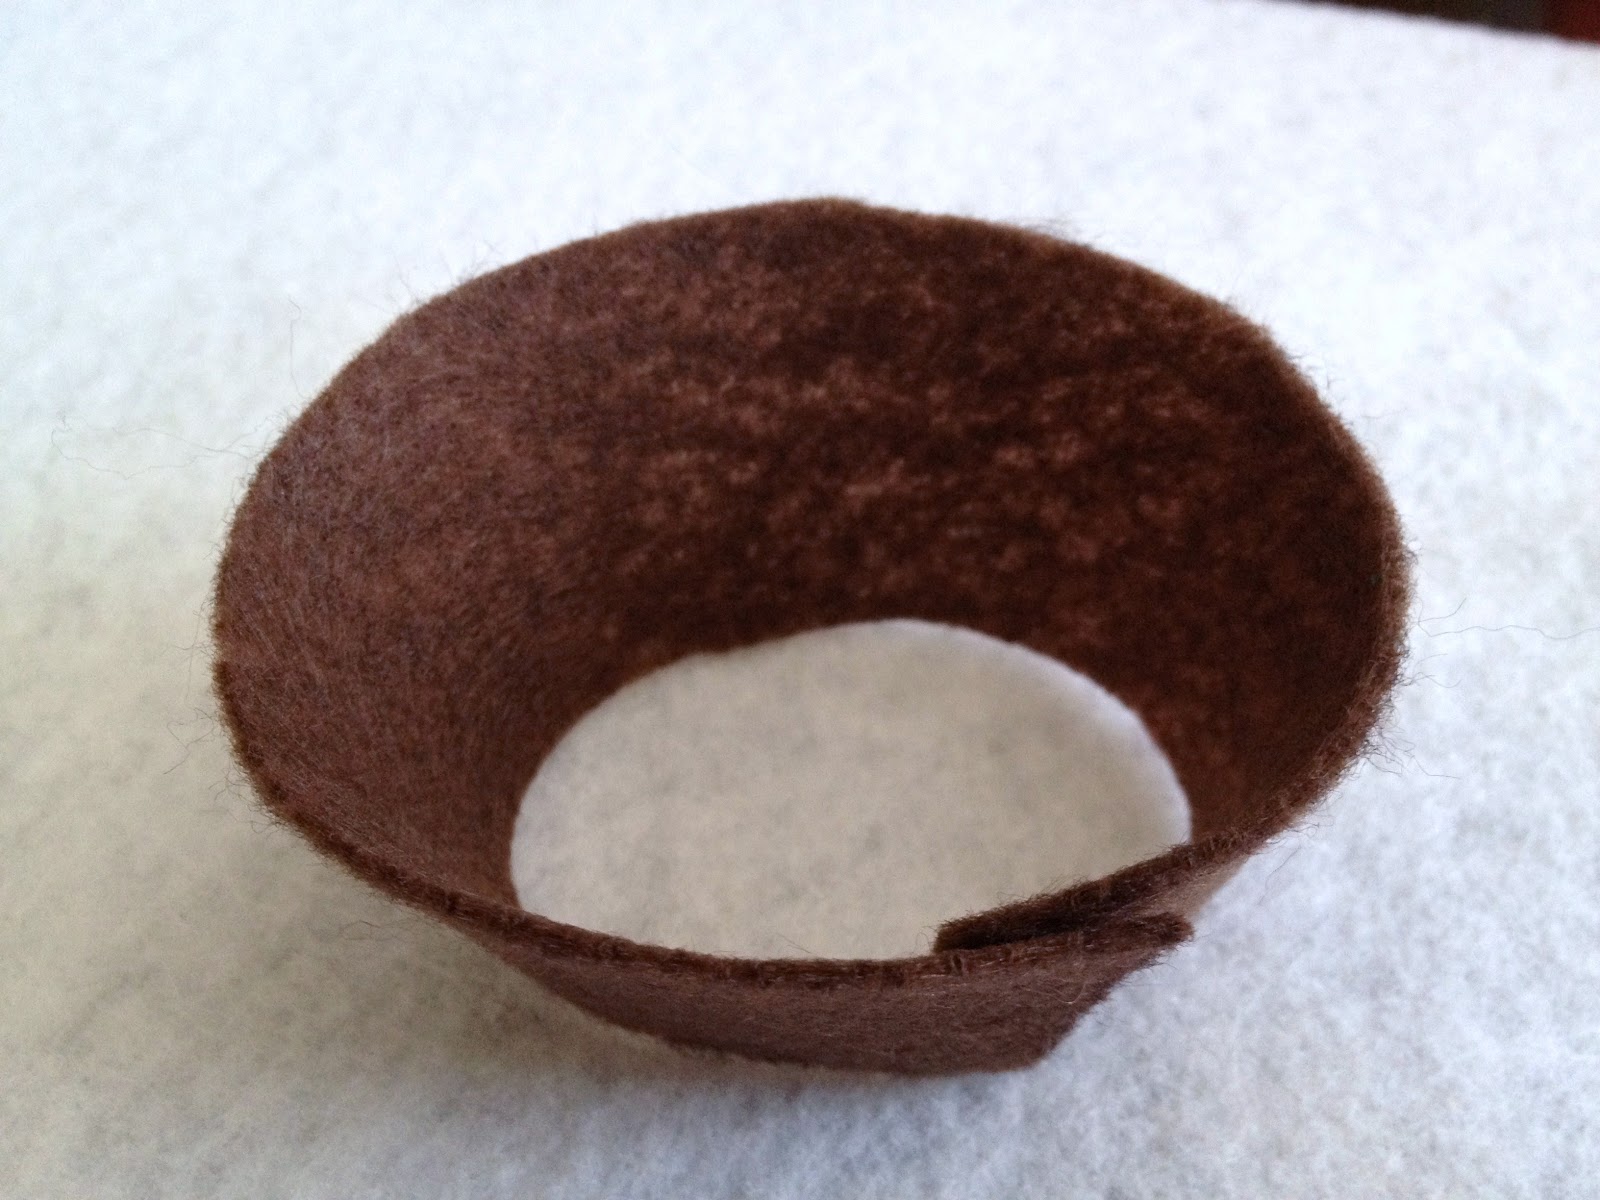
Take your cupcake side and overlap the two ends slightly.  It should look like this.. 


Sew the piece together using a whip stitch.  In case you don't know how to whip stitch by hand, here is a good video.  It's really easy and you can do this while watching t.v.  


Once that's done, you can sew the cupcake bottom to the cupcake side using the same stitch.  When you are done, it should look like this....


Next, sew the cupcake top on. About half way through, place your cardboard bottom on the inside of your cupcake.  This will help your cupcake stand.  No need to glue it on.  You will add the stuffing next and that will keep the cardboard in place.  Once you stuffed your cupcake, sew it shut.


Ice, Ice Baby!  Time to cut out some icing.


Once my icing pieces were cut, I went ahead and used fabric glue to place the icing.  You can sew this if you prefer. First glue Icing A, B, C, D, and the topping of choice all together.


Once the icing has been assembled, glue the entire top to the cupcake.  Allow to dry according to your fabric glue instructions (mine says 24 hours).

Viola!  Your cupcake is ready to be served at your child's next tea party.


I designed these cupcakes to be the same size as actual cupcakes, so you can put them in muffin tins or in cupcake liners.


Enjoy!