Showing posts with label baby. Show all posts

Tuesday, June 4, 2013

Surprise!


What I thought was going to be another run-of-the-mill office meeting, turned out to be a surprise belated baby shower/ welcome back party for me. 


Look at these amazing diaper/baby blanket creations my co-worker did for me.


It was such a sweet gesture.  I am lucky to be working with such a great group of people!

Friday, May 31, 2013

The Maternity Party is Over


Well, the party's over and back to work I go. For me, it marks an end of an era. You see, Julia is my last baby,which makes this my very last maternity leave. I know they won't remember this time in their lives, but I will always cherish these memories.

I recorded this little video of Julia the night before I went back to work. I just wanted to remember how she was right at this moment.

YouTube Video

- Posted using BlogPress from my iPhone

Tuesday, May 28, 2013

"Mommy, I Do It"

Lately my 2 year old daughter's favorite phrase is, "Mommy, I do it." And boy, does she want to do everything.  For Memorial  Day, I offered to bring dessert to a barbecue. So since I happened to have all of the ingredients for Dump Cake and the instructions are so easy, a two year old could do it, I decided to let Cora make her first dessert.  Here's how she made it...

You need:
  • 1 can (21 Oz.) Cherry Pie Filling
  • 1 can (15 Oz.) Crushed Pineapple
  • 1 box (about 18 Oz.) Yellow Cake Mix
  • 1/2 cup Chopped Pecans (optional)
  • 1 stick Margarine
  • 1/2 stick Butter

Preheat the oven at 350. 
While that's heating up, dump your can of cherries in a 9 x 13 pan.

Next, dump your can of crushed pineapple in the pan.  You don't need to drain it. Just dump the whole thing in.

Now mix until all of the fruit and juices are combined in fruit harmony.  

Now it's time for the cake mix. If you opted to add the pecans, dump the pecans in your cake mix.  Then dump the cake mix on top of the fruit. Spread it evenly throughout your pan. Do not mix it in with the fruit. You should have a layer of fruit and a layer of cake mix.

Cut up the margarine and butter into slices. Then distribute the pats of butter and margarine on top of the cake mix.

Of course, after Cora added the butter, I went in rearranged the butter, so it was more evenly distributed.  And of course every time I had to assist her, she said, "No mommy. I do it!" 

Now your Dump Cale is ready for the oven. Bake at 350 for 45 minutes to an hour.

Don't worry, I didn't really let her put the pan in the oven.  She was happy just to have oven mitts.

While ours baked, we cleaned up, had tummy time with Julia, checked in on our cake's progress, and sang songs.  

Once it was ready, I took it out of the oven and prepped it to take to the barbecue.  Unfortunately we were having a crisis at the time (I'll explain in a minute) and I forgot to take a picture of the fresh-out-of-the-oven cake.  Here it is after we got into it. Seriously delicious! It's kind of like a fruit crisp. My husband loves it with a scoop of Blue Bell Homemade Vanilla Ice Cream.  By the time we left, the entire cake was gone.

Okay back to my crisis.. Right as we were getting to leave, Cora decided to grab a smoky eyeshadow compact when I wasn't looking. She plopped herself right in the middle of my bed pillows (a favorite spot of hers), and decided to apply it herself.  I can just hear her saying, "Mommy, i do it!"  I have a white comforter and 2 white pillows. She and my bed were a mess when I found her!


We were so late, but at least her dessert was a hit!

Friday, May 24, 2013

All About Julia

Last year I told my husband that I really wanted to do something BIG for my 40th birthday in 2013. Well low and behold, I sure did do something BIG! I had my beautiful baby girl one week shy of my 40th birthday. It was the best gift I could have received.

The pregnancy started out a lot like my previous one... Tired the first trimester. No morning sickness, just queasiness that would pass after 15 seconds or so and serious fruit cravings. Even though I didn't want to say anything to my husband, I had a feeling this baby was another girl. At 5 months along, I found out my hunch was right.


We immediately decide to name her after my mother-in-law. Cora is named after my mom, and it just seemed right that we honored both of our moms.

Julia Annaliese came into this world one month earlier than planned due to extreme hypertension. I wasn't expecting to deliver that day, in fact I told my boss I was coming in late after my morning doctor's appointment. Unfortunately my blood pressure shot up to dangerous levels and my doctor decided we had to have her that day. Despite the emotional and chaotic start, I was very blessed to have an easy labor and delivery. In fact, I didn't even push. My doctor was prepping for the delivery. He didn't want me to push just yet. He had me just take deep breaths and next thing you know, Julia was born.


I think for Cora, it was love at first sight. She has been a wonderful big sister. I think she will always look out for her baby sister.


- Posted using BlogPress from my iPhone

Sunday, June 3, 2012

DIY: Making Felt Cupcakes (Free Pattern & Tutorial)


Aren't these just adorable?  One of the things I love about making felt food is that it's easy, inexpensive, and so cute once they're done.  I made these as my daughter napped today. I also took lots of pictures and created a pattern so you can make some too.

Here is the pattern.  Cut the pattern out and trace it on to your felt. Then cut your felt pieces.  Your cupcake pieces look something like this...

Okay I know it looks like a happy face.  I placed it that way because it made me giggle :-)  As you can see, we are making a chocolate cupcake.  So you should have:
  • cupcake bottom
  • cardboard bottom
  • cupcake top
  • cupcake side


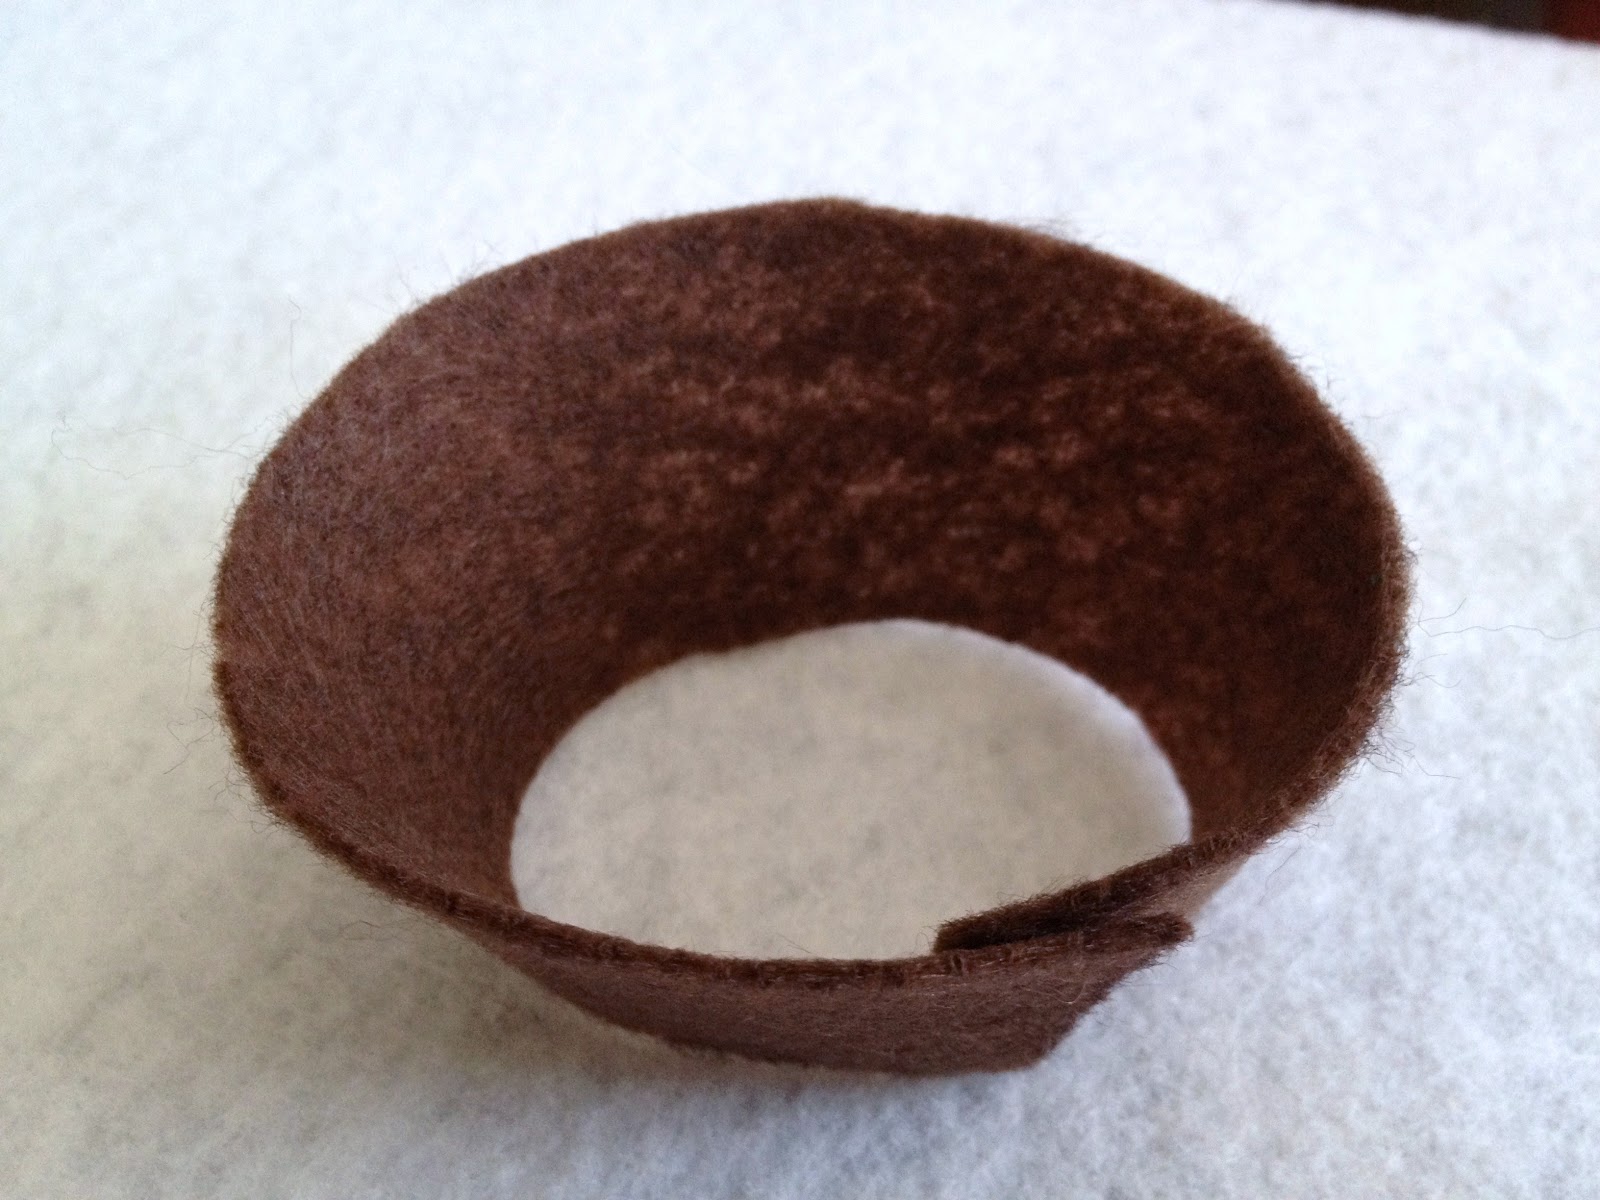
Take your cupcake side and overlap the two ends slightly.  It should look like this.. 


Sew the piece together using a whip stitch.  In case you don't know how to whip stitch by hand, here is a good video.  It's really easy and you can do this while watching t.v.  


Once that's done, you can sew the cupcake bottom to the cupcake side using the same stitch.  When you are done, it should look like this....


Next, sew the cupcake top on. About half way through, place your cardboard bottom on the inside of your cupcake.  This will help your cupcake stand.  No need to glue it on.  You will add the stuffing next and that will keep the cardboard in place.  Once you stuffed your cupcake, sew it shut.


Ice, Ice Baby!  Time to cut out some icing.


Once my icing pieces were cut, I went ahead and used fabric glue to place the icing.  You can sew this if you prefer. First glue Icing A, B, C, D, and the topping of choice all together.


Once the icing has been assembled, glue the entire top to the cupcake.  Allow to dry according to your fabric glue instructions (mine says 24 hours).

Viola!  Your cupcake is ready to be served at your child's next tea party.


I designed these cupcakes to be the same size as actual cupcakes, so you can put them in muffin tins or in cupcake liners.


Enjoy!


Thursday, May 24, 2012

Take Me Out To The Ballgame


We took Cora to her first baseball game the other night. I think she was overwhelmed by the sights and sounds. We didn't get to stay for the entire game, but we had a great time. Here are a few pics from the night...


- Posted using BlogPress from my iPhone

Sunday, May 20, 2012

Organizing A Hairy Situation


Cora's hair accessories were out of control. When she first started getting hair clips and barretts I'd put them in a little bowl on her dresser and it was fine. A year later, there were just too many for the little bowl, so I decided to organize it.


For my supplies, I used a plain 16 x 20 artist canvas, ribbon, and staples. I chose brown and golden yellow to coordinate with Cora's room.


I cut 6 stands of ribbon, each at 25 inches long. I then measured and stapled the ribbons 2 inches apart to the back of the canvas.


Staple the top and bottom and cut off any excess ribbon (if any) and the back should look like this...


Flip over and you're ready to add your hair accessories.


Have a great day!


- Posted using BlogPress from my iPhone

Saturday, May 19, 2012

Yum Yum Dim Sum!

Back in December, we took Cora to The Children's Museum and stumbled across this little Asian play area.


It was the first time I had seen Chinese play food. I really wanted to buy a set for Cora, but they didn't sell it in the gift shop and I couldn't find a dim sum set online. I guess if I wanted her to have one, I'm going to have to make it. Here's how it turned out...

Siu Mai


Dumplings, Mini Egg Rolls, and Bao


Banana Leaf Sticky Rice


I really love how these turned out. I may have to make sets for my nieces and nephews.

- Posted using BlogPress from my iPhone