Sunday, June 10, 2012

Recipe: Easy Peasy Chicken Nuggets


You know that yummy, crunchy topping that makes your Thanksgiving green bean casserole taste so good? It also makes great chicken nuggets! Here's my recipe for Easy Peasy Chicken Nuggets.

Ingredients:
2 chicken breast or 5-6 boneless/skinless chicken thighs
1- 6 oz container of french fried onions
1 tbsp of flour
1/2 tsp garlic seasoning
Black pepper to taste
1 egg (slightly beaten)

Preheat oven at 350.

Pour the French fried onions in a large ziplock bag. Take out the air out of the bag so it'll be flat. With a rolling pin, roll over the bag and crush up those onions into small bits and pieces. Add your flour, garlic seasoning, and pepper in the bag and shake to mix it. The coating should look like this...


Slightly beat an egg and set aside. Cut you chicken into 1 inch pieces and then coat them with egg.


Then your chicken in your in the bag to coat each piece and place on a foil lined cookie sheet (it makes cleaning up a snap!)


Once all of the pieces are ready, you may notice that you have extra coating. Don't discard it. Go ahead and spoon the extra crunchy goodness on each chicken piece.


Bake for 20 minutes and they're done!


I'm not a big sauce fan, so I don't serve my nuggets with sauce. Honestly, I think these nuggets have so much flavor, you won't need it. They are always a hit when I've made them for guest. I hope you enjoy them too!

- Posted using BlogPress from my iPhone

Sunday, June 3, 2012

DIY: Making Felt Cupcakes (Free Pattern & Tutorial)


Aren't these just adorable?  One of the things I love about making felt food is that it's easy, inexpensive, and so cute once they're done.  I made these as my daughter napped today. I also took lots of pictures and created a pattern so you can make some too.

Here is the pattern.  Cut the pattern out and trace it on to your felt. Then cut your felt pieces.  Your cupcake pieces look something like this...

Okay I know it looks like a happy face.  I placed it that way because it made me giggle :-)  As you can see, we are making a chocolate cupcake.  So you should have:
  • cupcake bottom
  • cardboard bottom
  • cupcake top
  • cupcake side


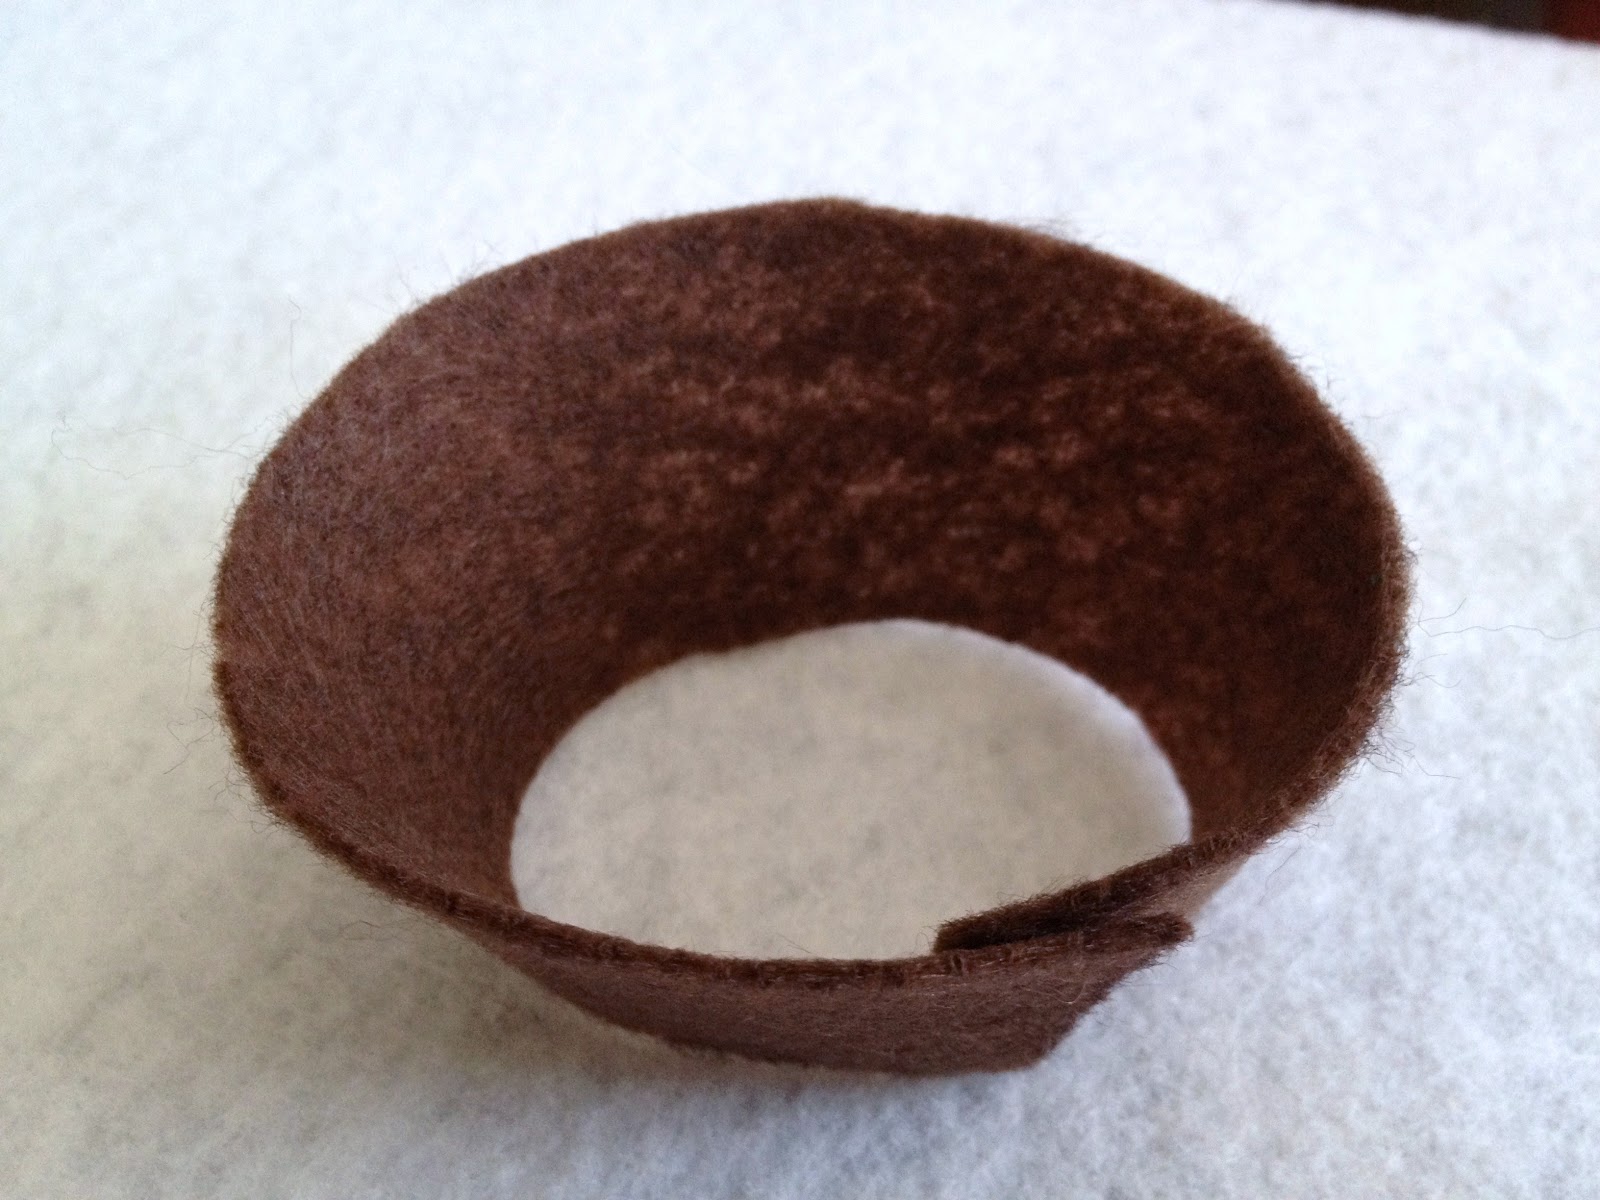
Take your cupcake side and overlap the two ends slightly.  It should look like this.. 


Sew the piece together using a whip stitch.  In case you don't know how to whip stitch by hand, here is a good video.  It's really easy and you can do this while watching t.v.  


Once that's done, you can sew the cupcake bottom to the cupcake side using the same stitch.  When you are done, it should look like this....


Next, sew the cupcake top on. About half way through, place your cardboard bottom on the inside of your cupcake.  This will help your cupcake stand.  No need to glue it on.  You will add the stuffing next and that will keep the cardboard in place.  Once you stuffed your cupcake, sew it shut.


Ice, Ice Baby!  Time to cut out some icing.


Once my icing pieces were cut, I went ahead and used fabric glue to place the icing.  You can sew this if you prefer. First glue Icing A, B, C, D, and the topping of choice all together.


Once the icing has been assembled, glue the entire top to the cupcake.  Allow to dry according to your fabric glue instructions (mine says 24 hours).

Viola!  Your cupcake is ready to be served at your child's next tea party.


I designed these cupcakes to be the same size as actual cupcakes, so you can put them in muffin tins or in cupcake liners.


Enjoy!


Thursday, May 24, 2012

Take Me Out To The Ballgame


We took Cora to her first baseball game the other night. I think she was overwhelmed by the sights and sounds. We didn't get to stay for the entire game, but we had a great time. Here are a few pics from the night...


- Posted using BlogPress from my iPhone

Sunday, May 20, 2012

Organizing A Hairy Situation


Cora's hair accessories were out of control. When she first started getting hair clips and barretts I'd put them in a little bowl on her dresser and it was fine. A year later, there were just too many for the little bowl, so I decided to organize it.


For my supplies, I used a plain 16 x 20 artist canvas, ribbon, and staples. I chose brown and golden yellow to coordinate with Cora's room.


I cut 6 stands of ribbon, each at 25 inches long. I then measured and stapled the ribbons 2 inches apart to the back of the canvas.


Staple the top and bottom and cut off any excess ribbon (if any) and the back should look like this...


Flip over and you're ready to add your hair accessories.


Have a great day!


- Posted using BlogPress from my iPhone

Saturday, May 19, 2012

Yum Yum Dim Sum!

Back in December, we took Cora to The Children's Museum and stumbled across this little Asian play area.


It was the first time I had seen Chinese play food. I really wanted to buy a set for Cora, but they didn't sell it in the gift shop and I couldn't find a dim sum set online. I guess if I wanted her to have one, I'm going to have to make it. Here's how it turned out...

Siu Mai


Dumplings, Mini Egg Rolls, and Bao


Banana Leaf Sticky Rice


I really love how these turned out. I may have to make sets for my nieces and nephews.

- Posted using BlogPress from my iPhone

Monday, May 14, 2012

Happy Mother's Day


This was my 2nd Mother's Day and my husband did a wonderful job of making it a special day. He had a delicious breakfast waiting for me and he planned a surprise lunch with my best mommy friends.

Wishing all the mothers out there a very Happy Mother's Day!

- Posted using BlogPress from my iPhone
Wednesday, May 9, 2012

Playing With Food

Since we built Cora a new kitchen, it was only right that she had some food to make and serve. I did a little research and found a great tutorial on making easy foods out of felt.

Here's how mine turned out...


For my egg, I sewed a topstitch around the yellow, but left a small opening so I could stuff it with batting. Then I sewed it closed.


For the pancakes. I sewed the butter to the syrup, then the syrup to just the top layer of the pancake. Then I top stitched the pancake to a plain pancake. I like having 2 layers because it makes it more durable.

Making the pasta.... I didn't have the fancy scissors like in the tutorial, so I just cut my jagged edges with my regular scissors. It made a mess, but gosh these turned out cute.


Doesn't it look like we're really cooking pasta?


Breakfast is served!


Mangia!


- Posted using BlogPress from my iPhone