Showing posts with label cakes. Show all posts

Sunday, June 3, 2012

DIY: Making Felt Cupcakes (Free Pattern & Tutorial)


Aren't these just adorable?  One of the things I love about making felt food is that it's easy, inexpensive, and so cute once they're done.  I made these as my daughter napped today. I also took lots of pictures and created a pattern so you can make some too.

Here is the pattern.  Cut the pattern out and trace it on to your felt. Then cut your felt pieces.  Your cupcake pieces look something like this...

Okay I know it looks like a happy face.  I placed it that way because it made me giggle :-)  As you can see, we are making a chocolate cupcake.  So you should have:
  • cupcake bottom
  • cardboard bottom
  • cupcake top
  • cupcake side


Take your cupcake side and overlap the two ends slightly.  It should look like this.. 
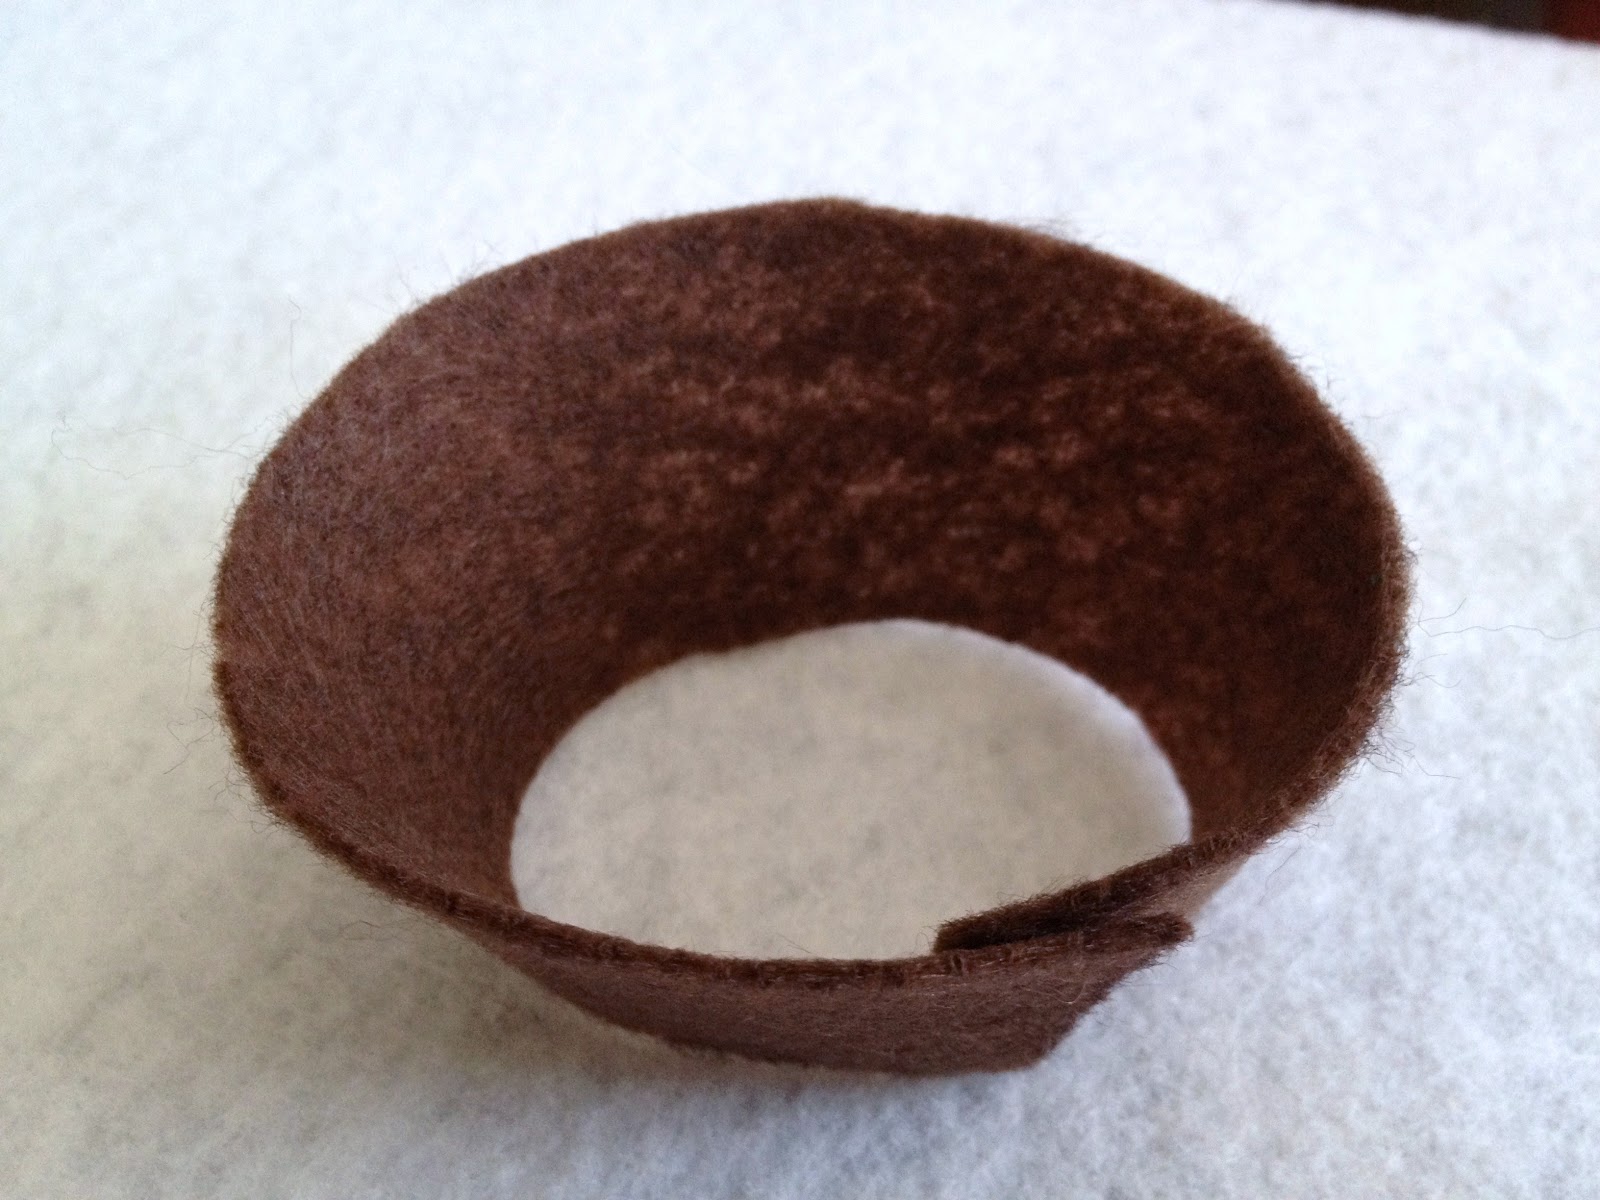

Sew the piece together using a whip stitch.  In case you don't know how to whip stitch by hand, here is a good video.  It's really easy and you can do this while watching t.v.  


Once that's done, you can sew the cupcake bottom to the cupcake side using the same stitch.  When you are done, it should look like this....


Next, sew the cupcake top on. About half way through, place your cardboard bottom on the inside of your cupcake.  This will help your cupcake stand.  No need to glue it on.  You will add the stuffing next and that will keep the cardboard in place.  Once you stuffed your cupcake, sew it shut.


Ice, Ice Baby!  Time to cut out some icing.


Once my icing pieces were cut, I went ahead and used fabric glue to place the icing.  You can sew this if you prefer. First glue Icing A, B, C, D, and the topping of choice all together.


Once the icing has been assembled, glue the entire top to the cupcake.  Allow to dry according to your fabric glue instructions (mine says 24 hours).

Viola!  Your cupcake is ready to be served at your child's next tea party.


I designed these cupcakes to be the same size as actual cupcakes, so you can put them in muffin tins or in cupcake liners.


Enjoy!


Thursday, February 16, 2012

A Year In A Flash - Celebrating Cora's Birthday


A few months ago, I was hunting for cute birthday party themes for Cora's First Birthday. I came across Stacey's party and thought it was the perfect theme for us. Here's what we did...

I created a photo collage (above) on my fav photo site picnik (so sad this site will be shut down in April). The collage was used for the invitation and for the cake.


The Invitation
The invitation was created on Paperless Post. I'm not the biggest fan of paper invitations
because of all of the paper waste, but I understand that some people don't have e-mail (like my mom). Paperless Post allows you to create beautiful e-invitations/e-cards, but you also have the option to print them out. Here is what the invitation looked like. I just printed this on nice card stock.


Timeline Banner
Since the venue for the party was already beautifully decorated, I kept my party decorations fairly simple. I knew the colors of the room had a lot of earth tones, so I chose pink and green for the party colors.

I created a timeline banner of Cora's first year. I painted clothes pins in glued on the number medallions with a hot glue gun. The medallions were just a punch of paper and the numbers were cut from my Cricut machine.
The timeline banner held pictures of Cora from each month of the past year.


Treats
I had two tables of food. One table was a snack table and the other was a yummy treat table. Here are the details...
My uncle and I made the wonderful cake pops. I find that traditional cake balls are too sweet, so instead of balling up cake and icing and dipping them in chocolate, we just just cut out pieces of pound cake, inserted the pop sticks, froze, then dipped in colored chocolate. The decoration on the pops are from chocolate transfer sheets. the flower pot was $0.79 at Ikea. I just cut out a large flower and a C on the Cricut and glued it on.

The cookies are done just like my easy no bake thin mints. Except that I used colored chocolate instead of Andes mints and used the chocolate transfer sheets again.

The popcorn bags were made from small treat bags. I used the Cricut to cut out C's and 1's and glued them on the bag. The popcorn was a salty/sweet mixture of cheese and caramel popcorn.
More Goodies!
I knew I'd be crunch for time to do a cake so I purchased a 1/2 sheet cake from Costco and asked them to only ice it in white. I took a jpeg of the collage picture from Picnik and had an edible sugar sheet made at a local cake supply store. I also purchased the colored Sixlet chocolate balls to border the cake. I found the CORA letter candles at Party City.

In keeping with the colors of the theme, I offered 2 beverages: pink strawberry punch, and cucumber water. I put them in beverage dispensers.

Since my party started at 2:30 in the afternoon, I just had deli and veggie trays, love dip and chips, and fruit skewers. The chocolate oat crisp cookies came from Ikea (I love those cookies!).


Photobooth and Party Pics
I made fun pink and green shades and moustaches. I also made talk bubbles out of chalkboard contact paper, matting board, and wooden dowels. I hired a photographer who captured photo booth type pics and all of the other party pics. I really love how this turned out!


Party favors
Last but not least, since I had leftover chalkboard contact paper, I decided to make mini talk bubbles to put in the party favor bags. The kids got mini talk bubbles, chalk, stickers, and other various goodies.

We had a wonderful party and Cora was showered with a lot of love! I hope you enjoyed the pictures!

Have a happy day!

Wednesday, June 1, 2011

Molten Chocolate Nutella Pudding Cakes

I had a few friends over for dinner tonight. For dessert I decided to try out a new recipe I spotted in All You. This cake had rave reviews and was pretty easy to make. I posted a pic on Facebook and a lot of people asked for the recipe, so here it is...

Molten Chocolate-Nutella Pudding Cakes

  • YIELD: Serves 6
  • PREP TIME:
  • BAKE: 30 MINUTES
  • COST PER SERVING:$1.12
  • COURSE: Desserts
Ingredients
  • 1/2 cup all-purpose flour
  • 1/2 cup unsweetened cocoa
  • 1/2 teaspoon baking powder
  • 4 ounces semisweet chocolate, finely chopped
  • 8 tablespoons (1 stick) unsalted butter, cut into pieces
  • 4 large eggs
  • 1 teaspoon vanilla extract
  • 1 cup sugar
  • 1/4 teaspoon salt
  • 6 tablespoons Nutella
Preparation
  • 1. Preheat oven to 350ºF. Mist 6 6-oz. ramekins with cooking spray. Place a roasting pan in oven; pour in 1/2 inch of hot water. In a bowl, whisk flour, cocoa and baking powder.
  • 2. Combine chocolate and butter in a microwave-safe bowl; cook on high, stirring once or twice, until almost melted, 1 to 2 minutes. Whisk until smooth. (I only needed to microwave for 1 minute.)
  • 3. In a bowl, with an electric mixer on medium-high speed, beat eggs, vanilla, sugar and salt until pale yellow, about 5 minutes. Beat in melted chocolate mixture. Stir in flour mixture. Spoon half of batter into ramekins. Drop 1 Tbsp. of Nutella into center of each. Cover with remaining batter.
  • 4. Transfer ramekins to roasting pan. Bake until cakes have risen and are cracked on top, about 30 minutes. Let cool for 5 minutes. Serve warm.